Revisiting your projects every once in a while is a great idea, and when talking to key users they often will confirm that there are some issues with the setup. Yet, their answers usually are vague, lack precision and more importantly – samples. It’s not their fault. It’s up to us to provide them with an easy way to report issues. Here’s how I do it.
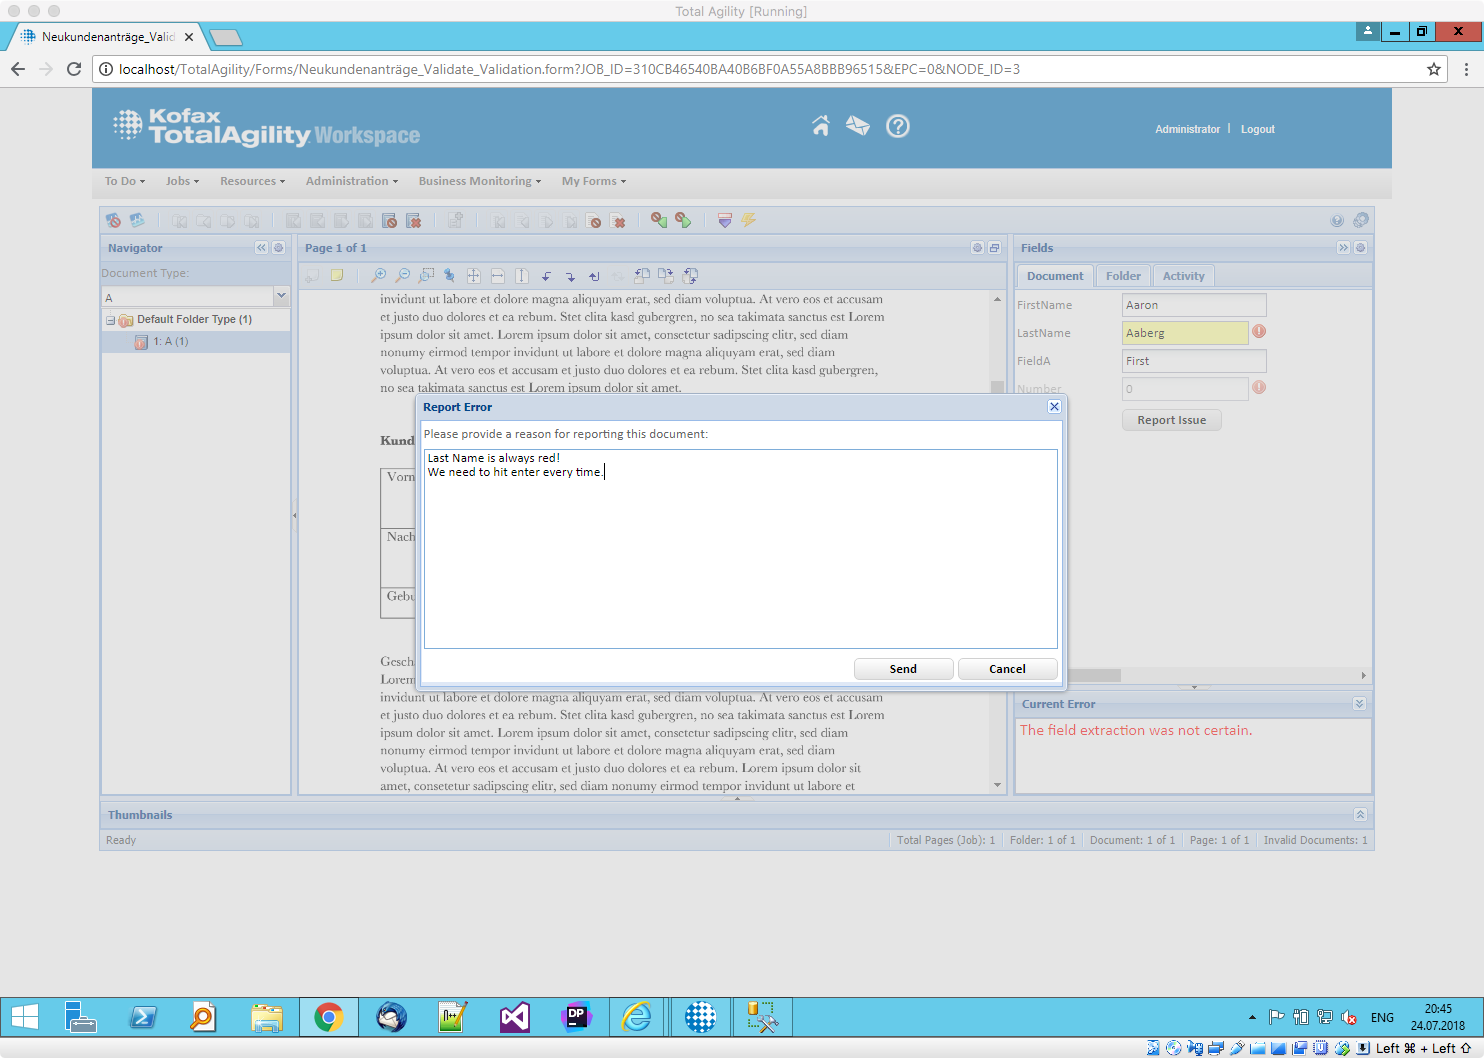
With the click of a button, your users can bring up a dialog and report an issue for the associated document. They can (and should, ideally) also provide some descriptive text, just like in the above example: “Last name not found”.
So, what happens with that report? It’s being logged in SQL, in a specific table. Now, imagine coming back to the project, and instead of talking just vaguely about issues encountered seeing this screen:
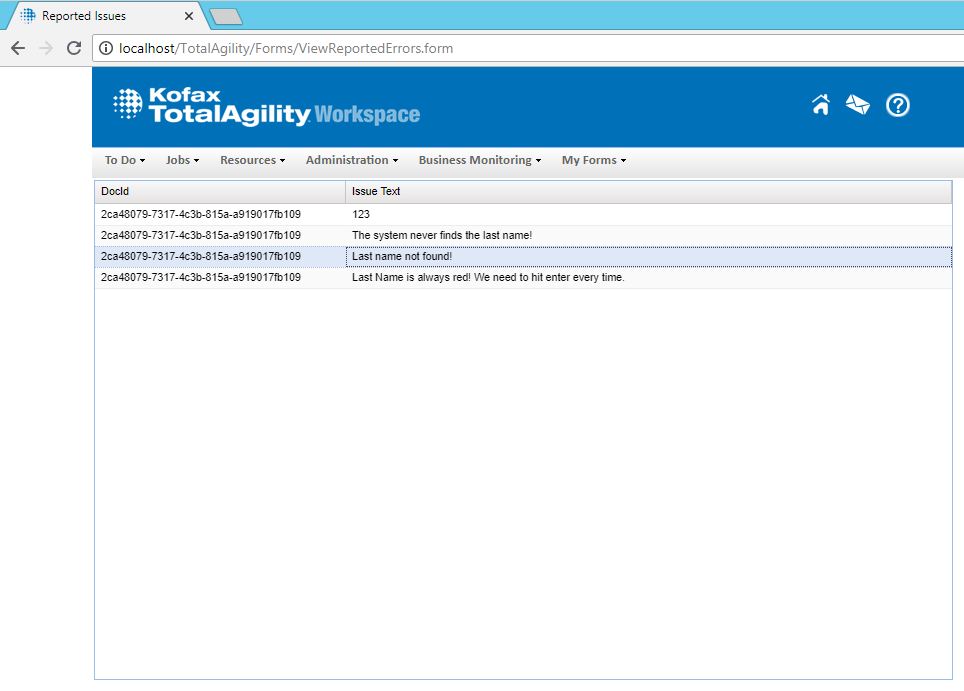
You would be able to immediately see the issues at hand, sort them, categorize them, and deal with them. The most important part – you would have a sample as the unique document id was logged along with a description!
First of all, here are my requirements and design choices:
- Everything should be reusable. The dialog shouldn’t be tied to one particular (validation) from. As such, I decided to go for a popup form without any navigation or header.
- The reported issues should be stored in a place where it’s easy to retrieve them. As such, using SQL seems reasonable.
- The report should contain appropriate metadata to support further analysis. As such, I decided to store the Document Id along with every issue reported.
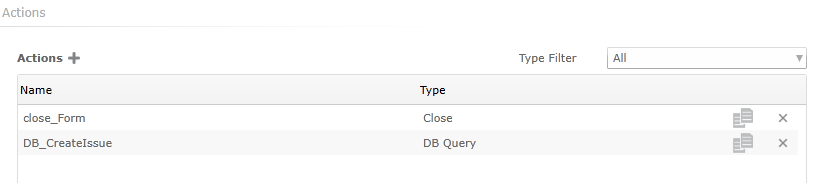
The Popup Form
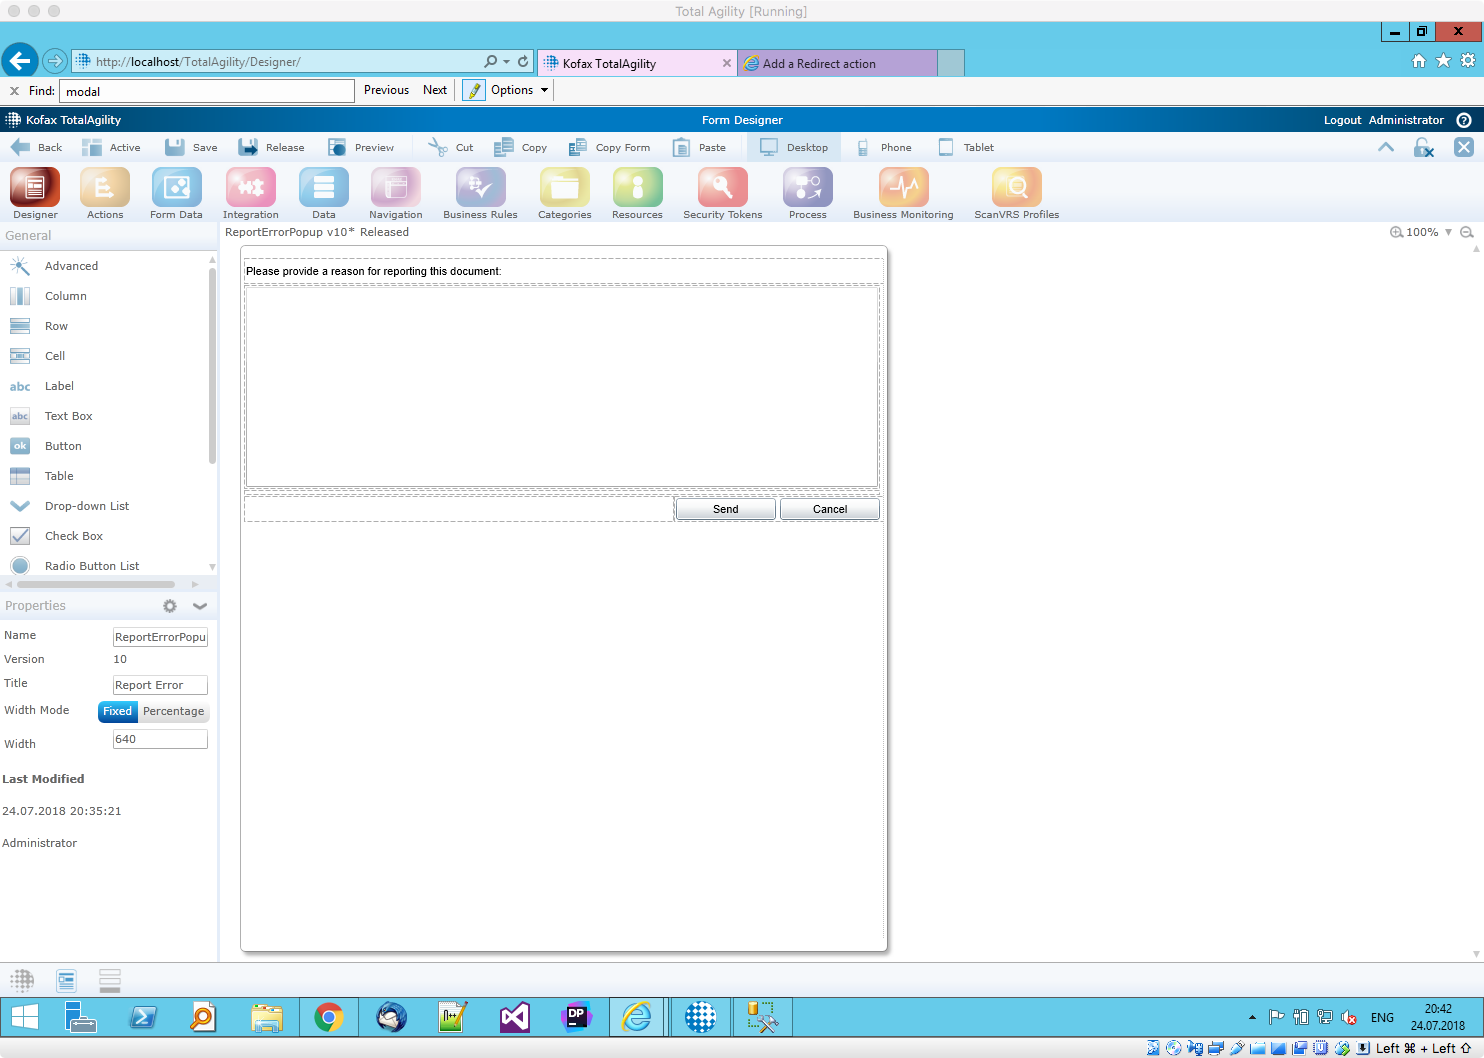
Here’s a general overview of my popup form. There isn’t much more than a textbox for the custom text and two buttons for either reporting the issue or canceling the request. Note that this form has neither navigation nor a header.
Now for the variables – the idea is that a validation form opens the popup, providing the current document id. Hence, we need a variable for storing it that’s being added as an initialization variable (on the form’s properties).

There are two form actions – one is tied to the Close button, and all it does is – you guessed it, close the form. The other one of type DB Query is responsible for inserting the report into our table.
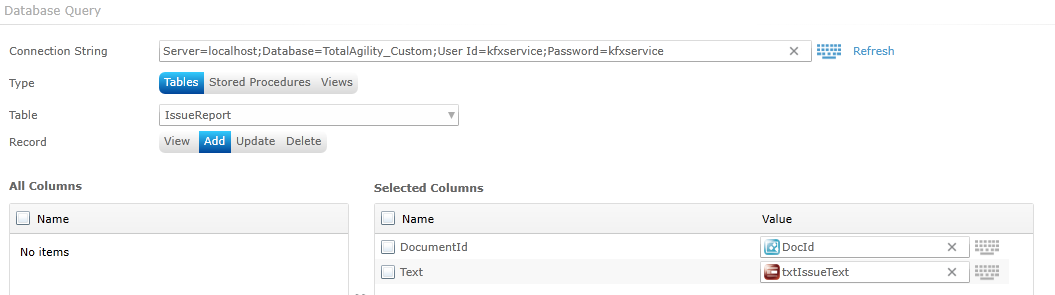
Again, the configuration for the DB Query action is pretty straight-forward. There’s a connection string, the table has been selected, and the values are being mapped accordingly. That’s it – there really isn’t much more to do.
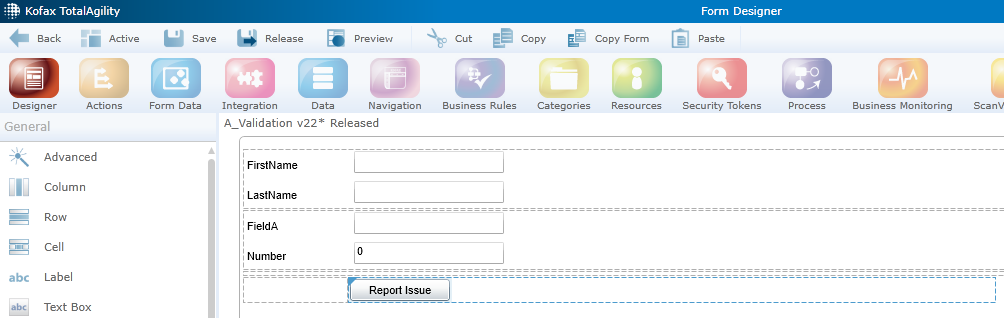
The Calling Form
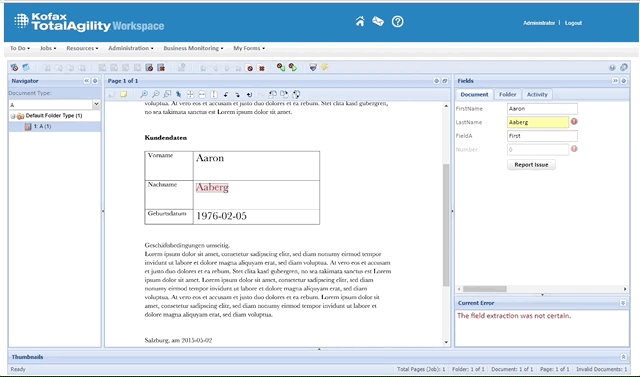
Now it’s time to pop up our dialog. Note that we could use the popup form on any other form, but naturally validation forms or forms that will provide a document id make the most sense. The following screenshot shows the overview of a very simple validation form which contains a new button that allows for reporting issues with the current document:
The button itself is tied to a Redirect action, which then again is configured as follows:

Note that we provide the popup form with the DocumentId variable which was created automatically when we generated the document (validation) form. Since the popup doesn’t have to return any data to the calling form, there isn’t much else to do in the Configure section (you could set the dialog to modal and change the popup’s size).
Conclusion
The good thing about the popup dialog is that it’s perfectly reusable – on any form. Still, you need to add it to the document validation form first, and if you have lots of different document classes with specific forms each, you may want to put this on the container dialog instead (yet then you need to find another way of getting the document id of the currently selected document).
And while it might be a good idea to add additional metadata to the table (such as a timestamp, the user) a lot can be learned by just providing the document id. Just make sure that your retention policy doesn’t remove your last straw, ideally by revisiting your projects often.