What if you wanted to allow users to optionally attach documents to any process or case? How difficult would it be to display them? What’s the best approach, should we use a folder variable or document sets? Well, here’s the answer – it’s much simpler than I anticipated, and 100% code- (and JavaScript-) free!
In order to ready for adding capture activities to the process later, I decided to go for a folder variable right away. Essentially there’s just one simple activity with the folder id as the input variable (you can’t directly map the folder, but you can copy the id to a variable first and consume that later on as input). Anyway, we want to talk about forms, so here’s my basic design. Note the two fields in the upper left corner – those are two input variables, and the whole cell is set to be hidden.
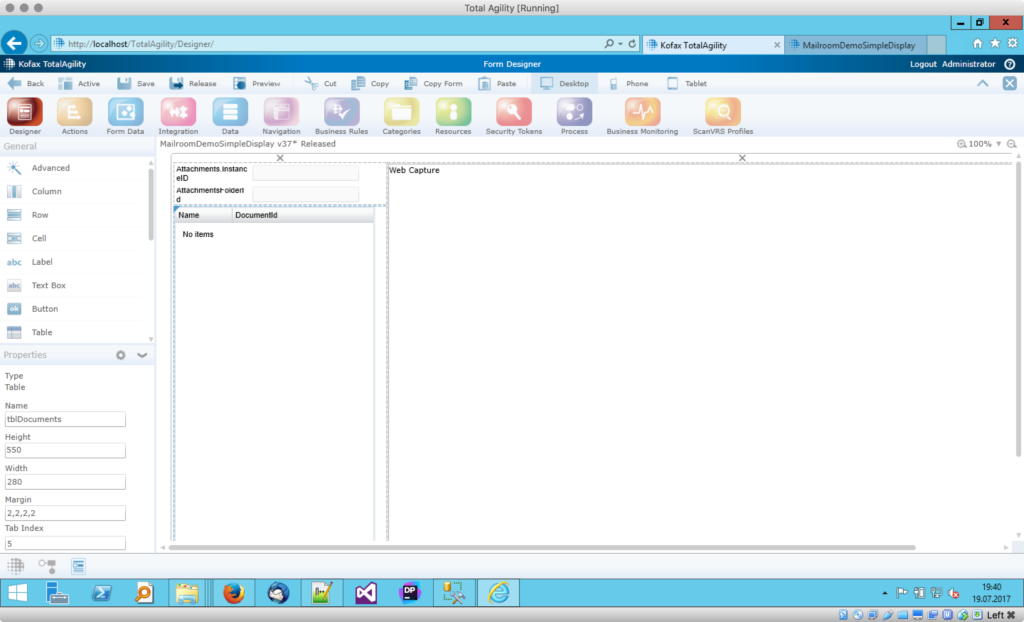
I decided to go for two columns: the left one will hold a table that will later on display all documents that are contained in the folder. The right column, being much wider, holds a simple web capture control. There’s not much to configure yet – in fact, the latter one isn’t configured at all, all I changed was its name. Here’s what I want this form to do:
- After the form has loaded, the table should hold all documents – one row per document;
- After the form has loaded, we want to automatically select the very first entry (if present);
- When the user clicks on a row, the respective document should be displayed in the viewer.
Let’s have a look at the required actions:
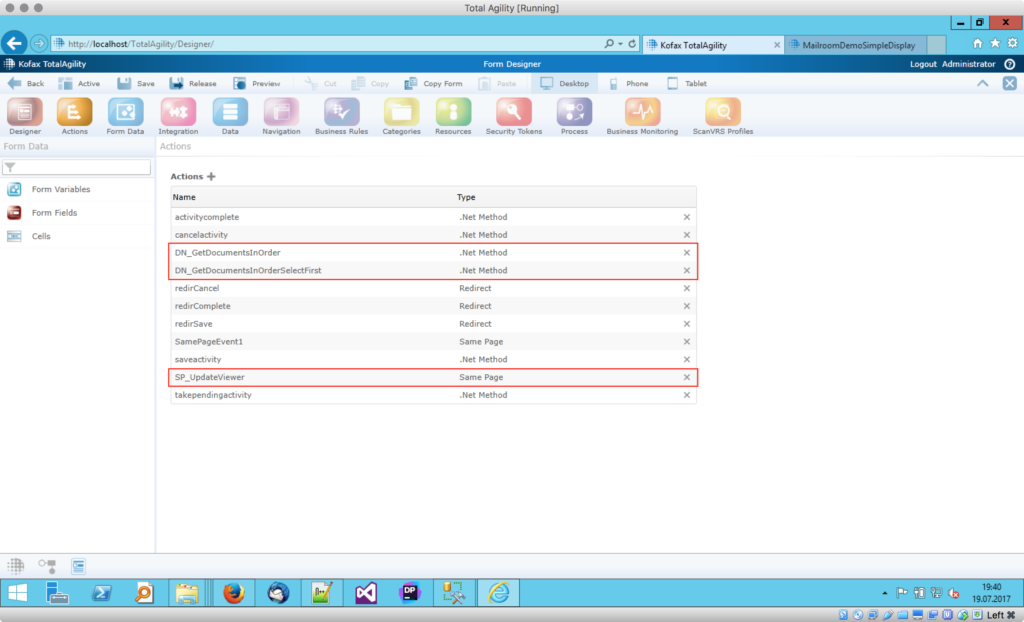
Here’s one action for each requirement – two .NET method calls, and one same page action.
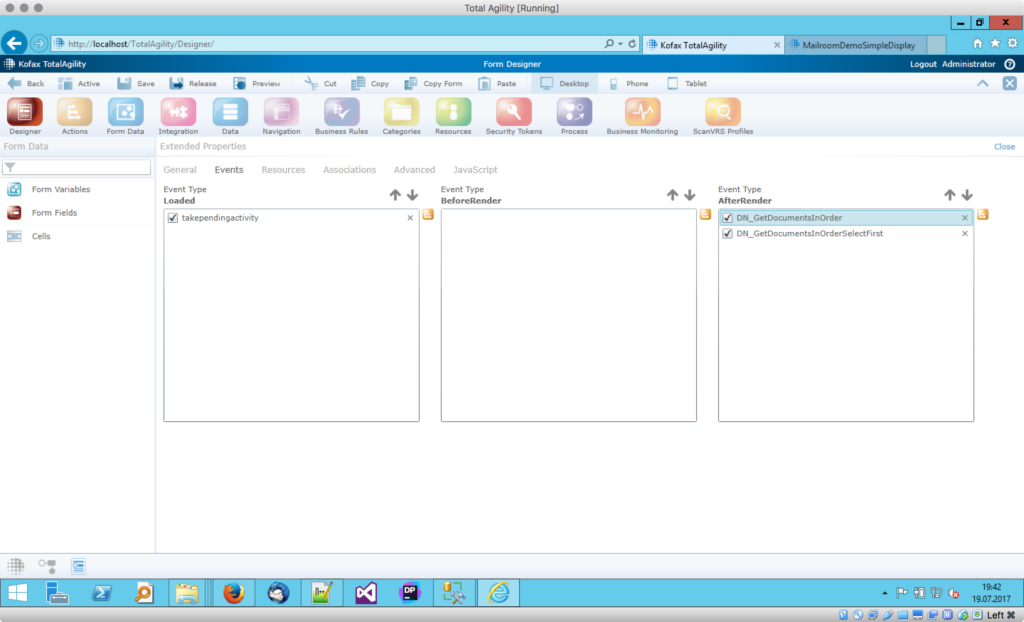
- DN_GetDocumentsInOrder – this method will query the folder for all documents and update the table;
- DN_GetDocumentsInOrderSelectFirst – same call here, but we work with the first item returned only;
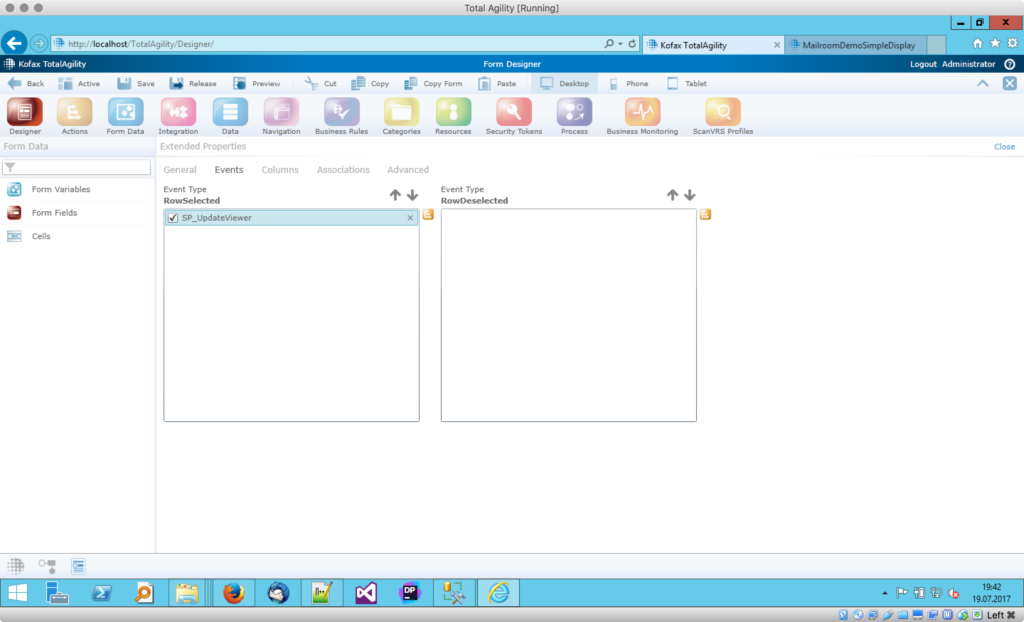
- SP_UpdateViewer – we will update the viewer as the user clicks individual rows in the table.
Let’s dive into each action:
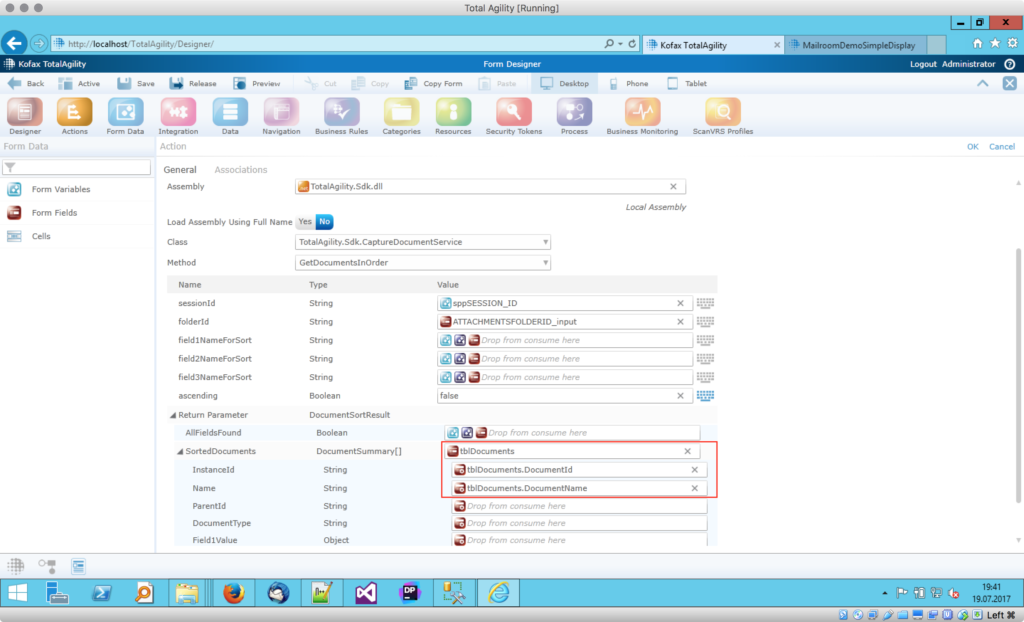
Not much to do here besides from providing both session id and the folder id (our input variable is automatically mapped to a field). The return parameter, in our case a sorted collection of documents, will be mapped to the table – as you can already see, I created two columns upfront. One for the document id, and the other one for the name – you may safely set the first one to invisible, later on.
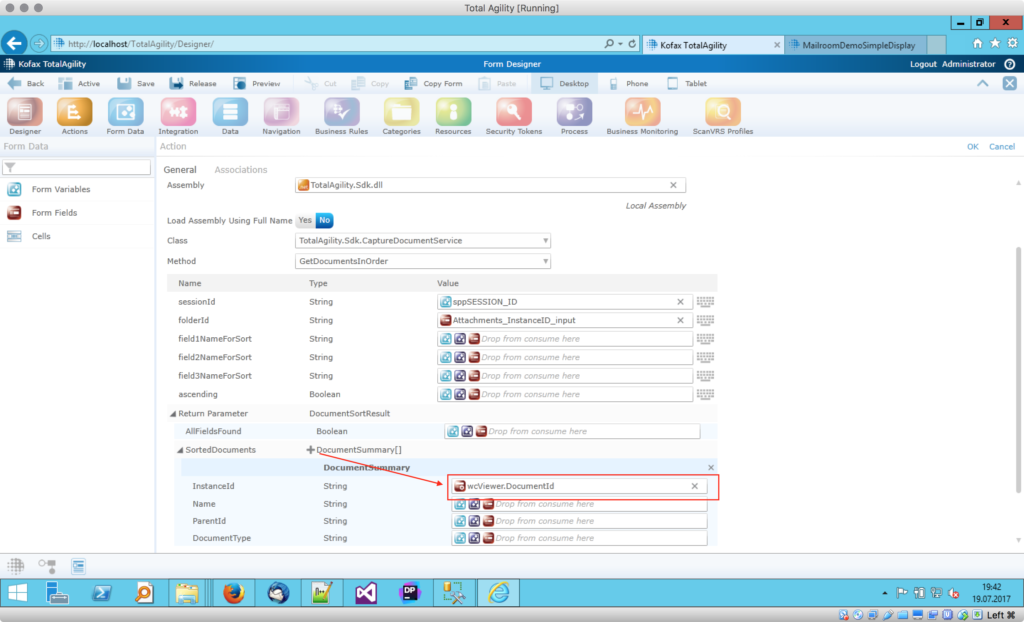
Here’s the second action that does not differ much from the first one – with one tiny exception. This time we expand the return array and map the first item directly to the DocumentId column of our table – that will make sure this row gets selected automatically, later on. I was quite surprised about that – I was looking for a selectedRow property somewhere, but it turned out all you have to do is to set said property.
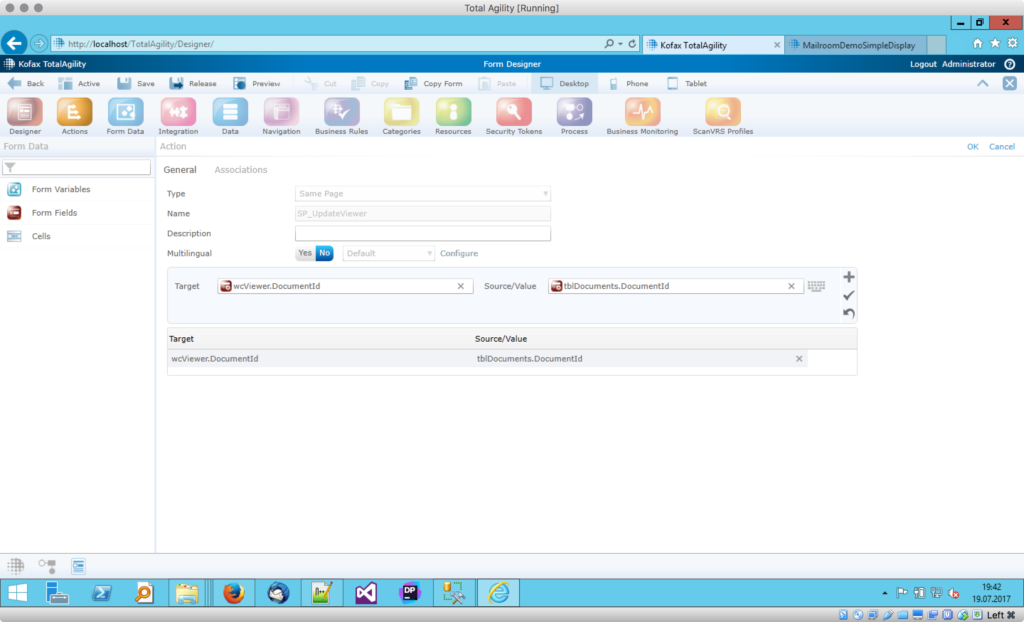
Our last action is pretty straight-forward, too: we simply set the web capture viewer’s document id to the currently selected item. Again, I was looking for a selectedRow property while you can just consume the entire row and let KTA take care of the rest. I admit, it is not just a bit confusing – but as long as you know it, it works as a charm.
That’s almost it – all that’s left is to link actions to events:
Conclusion and outlook
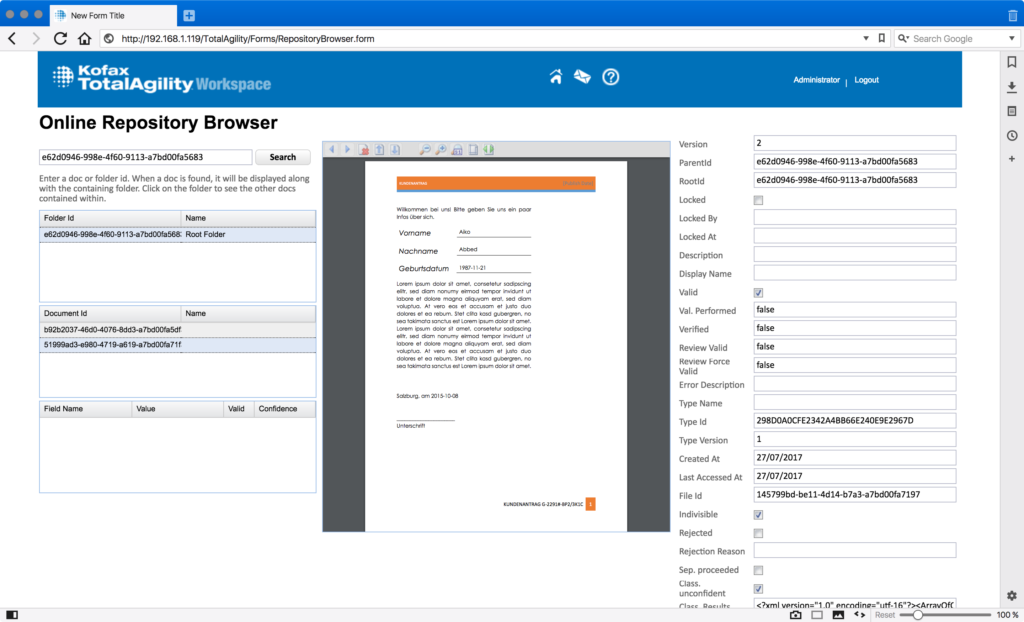
That’s it – you just built yourself a nice and easy document viewer. What I particularly like about the web viewer is that you can easily disable certain elements – such as uploading or deleting new documents. In theory, we could build ourselves an online repository browser…