Sometimes you are required to deliver data to your customers. What if you do not possess a beautiful CMS system such as WordPress? Of course, you could just set up a FTP server and provide your customers with login credentials. These who are technical aware will use a proper program to access the data (and thus won’t care for beauty), but those who do not know how to use such a tool will be prompted with something like that:
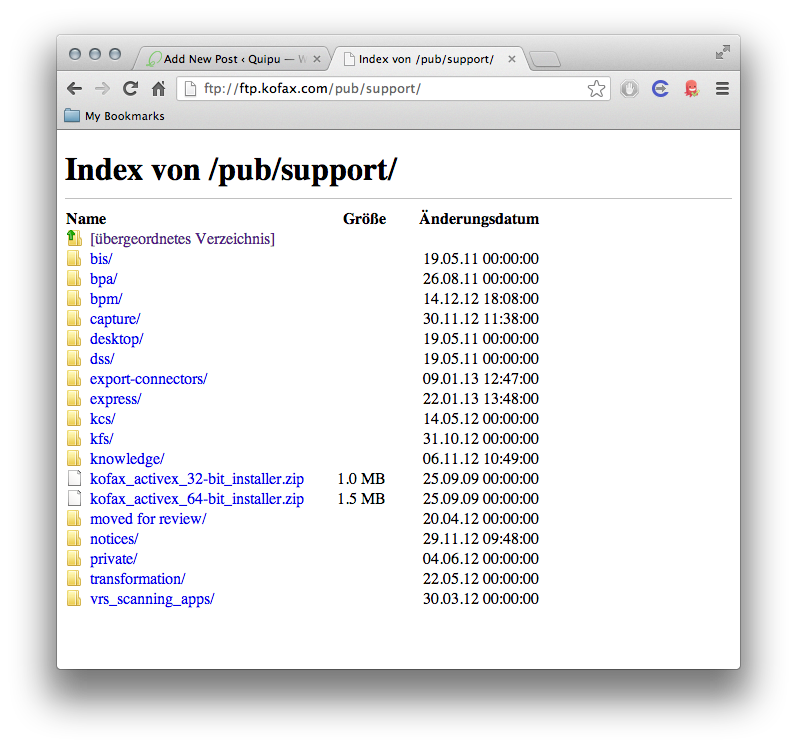
A real beauty, isn’t she? We can do much better than that. This time the idea is to create a download server for many customers – where each customer would need to receive individual files (imagine you providing 50 customers with 50 different PDF files). The restrictions? No FTP and – more important – no database. And no programming involved. Sounds impossible? Well no, thanks to the directory listing and the fancyindexing feature of the Apache web server you can create a quite beautiful download site for each individual customer. Results first:
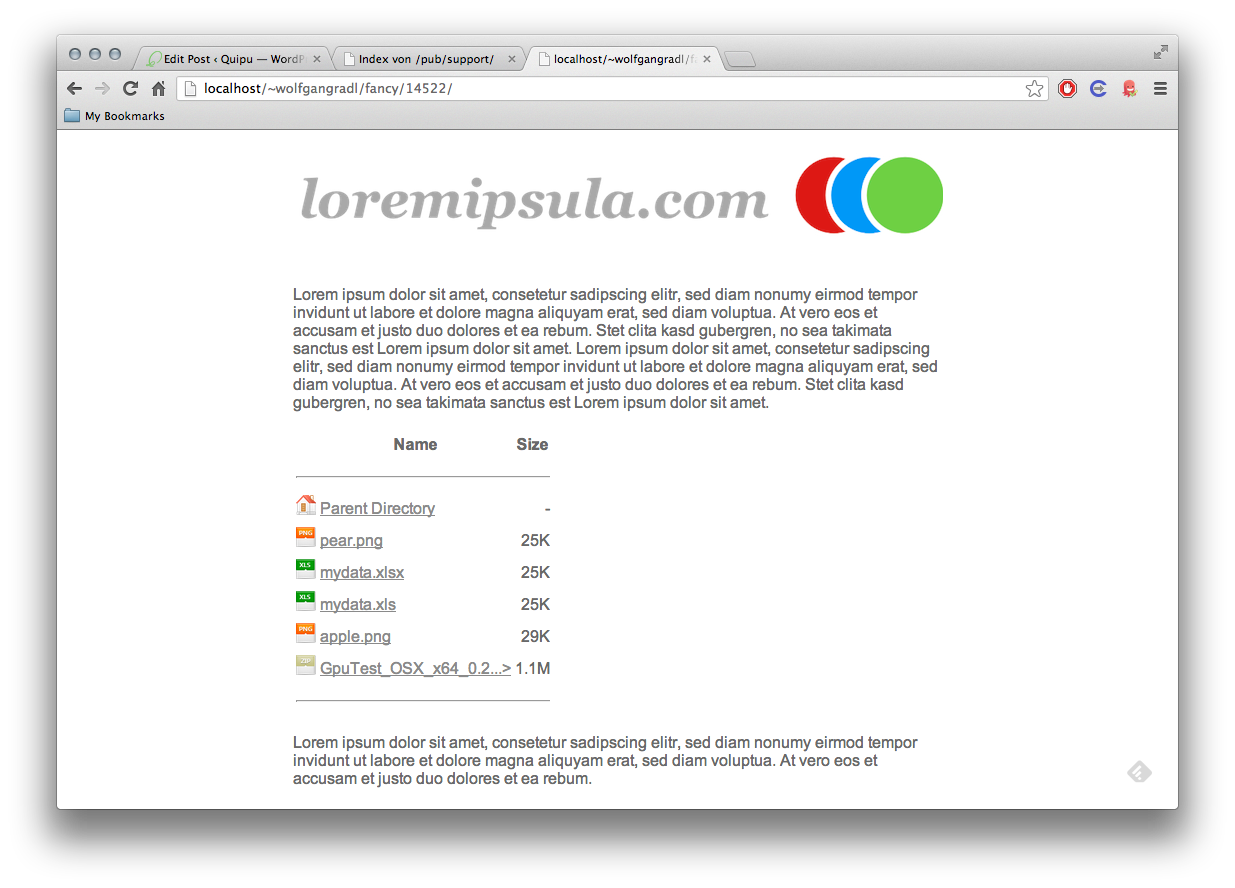
The results can be quite stunning when you know your way around with HTML and CSS, but the more important fact is: we did use the Apache webserver for the result only. No database, no(t too much) coding, no FTP server involved. I promise.
Step 1: Understanding the whole thing
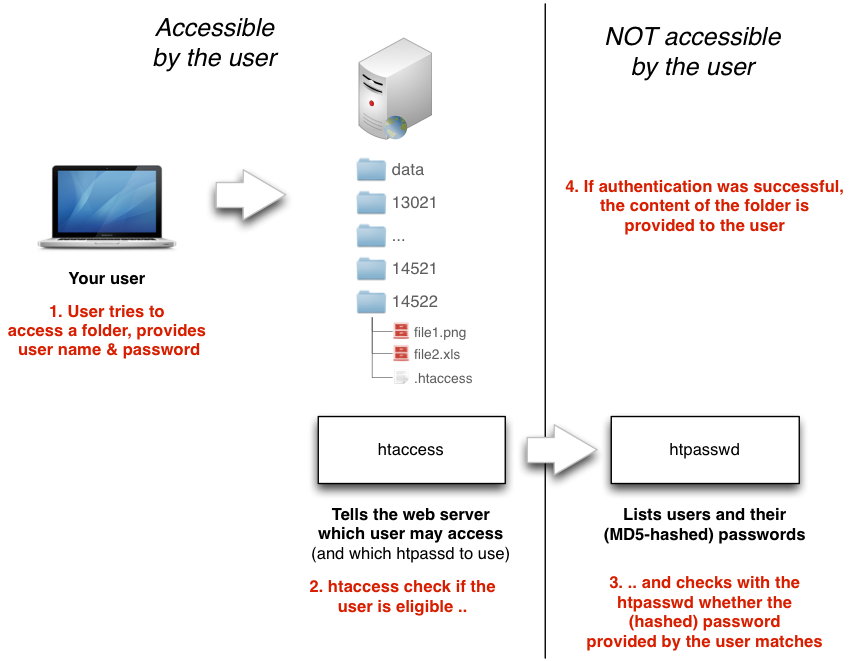
The diagram above pretty much explains all the magic involved (simplified, of course).
- A user tries to access a folder on your site, for example: www.loremipsula.com/14522
- The Apache web server checks first if the user name provided may access this directory
- If the name matches, the web server check if the password provided by the user matches the password in the htpasswd file
- If the authentication was fine, the user can access the files provided in the directory.
The only thing that is VITAL is that the htpasswd file is not accessible to the general public (usually it is not).
Step 2: Allowing Indexes
The next step is to tell the Apache web server that Indexing should be allowed for a certain directory. This setting usually resides in the httpd.conf file of the web server (note: on OS X systems there is a separate file called {username}.conf in the directory /private/etc/apache2/users which overrules the settings from the httpd.conf!).
Let’s say I want to enable indexes, my directory tag could look like this – AllowOverride is set to All:
<Directory "/Users/wolfgangradl/Sites/">
Options Indexes Multiviews
AllowOverride All
Order allow,deny
Allow from all
</Directory>
Note that there is a separate switch Indexes only. You may find more detailled information here. Now a separate .htaccess file will be accepted by the web server in my directories!
Step 3: Creating users and passwords
Let’s say I’ve got five different users: each user is assigned a unique number. Each user is assigned a password. For testing purposes, you can use this tool to generate several passwords for your users. If you have to create more users, you should either use the command line tool or use a script.
Finally, my htpasswd file looks as follows:
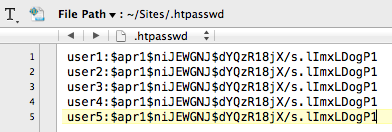
For testing purposes, the password for each user is ‘test’.
Step 4: Creating folders and define access
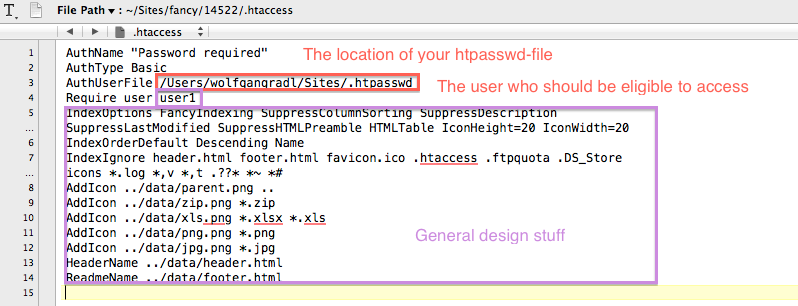
Now let’s create one folder per user. Within each folder, we need to place a file called .htaccess with the following content (you need to change the location of the htpasswd file):
AuthName "Password required"
AuthType Basic
AuthUserFile /Users/wolfgangradl/Sites/.htpasswd
Require user user1
IndexOptions FancyIndexing SuppressColumnSorting SuppressDescription SuppressLastModified SuppressHTMLPreamble HTMLTable IconHeight=20 IconWidth=20
IndexOrderDefault Descending Name
IndexIgnore header.html footer.html favicon.ico .htaccess .ftpquota .DS_Store icons *.log *,v *,t .??* *~ *#
AddIcon ../data/parent.png ..
AddIcon ../data/zip.png *.zip
AddIcon ../data/xls.png *.xlsx *.xls
AddIcon ../data/png.png *.png
AddIcon ../data/jpg.png *.jpg
HeaderName ../data/header.html
ReadmeName ../data/footer.html
Although most of it should be clear, here’s a more detailled explanation:
Final step: Design!
The last step is about the design. As you may have seen, the purple section contains a lot of design-related settings:
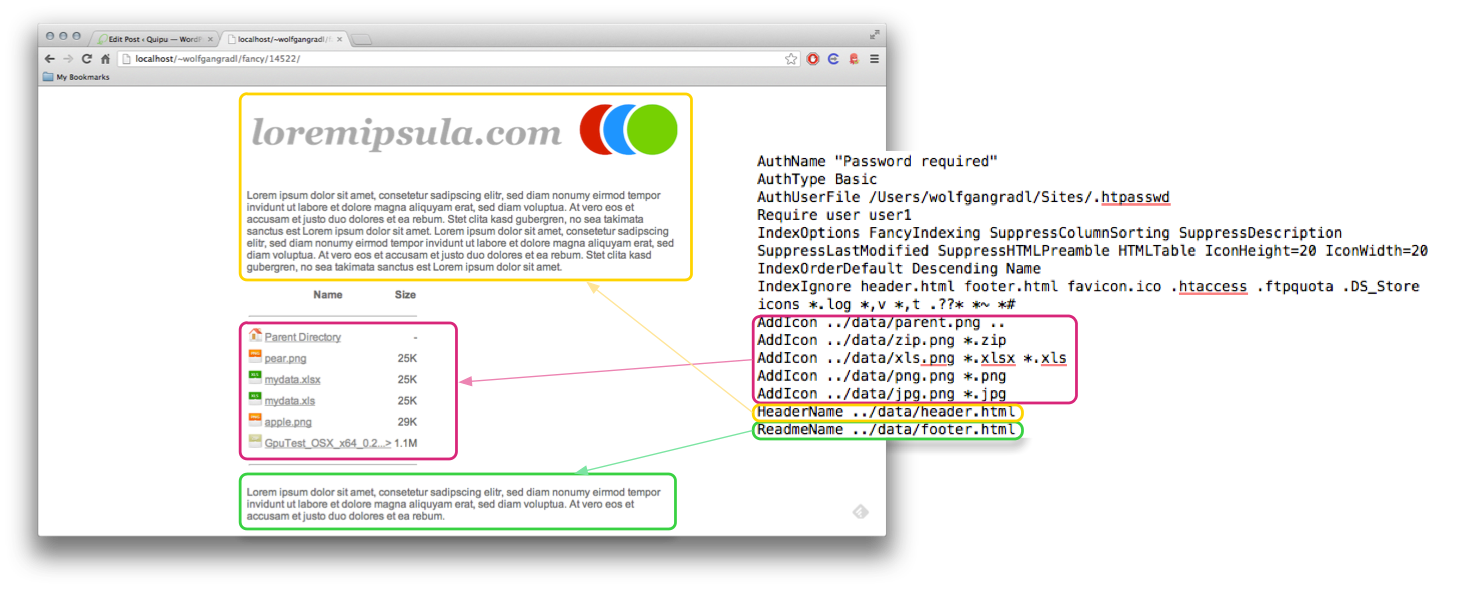
As you can see, I currently:
- Use my own header and footer files for a custom logo and custom text and
- Use my own icons for different files that reside in the directory
All available options are explained in detail here. That’s almost it – now I just need to adjust the user in each and every .htaccess file and put it to the respective directory.
Please note that we are just using http basic authentication here which can be rather insecure if someone can access the traffic – the (hashed) passwords are transmitted base64 encoded only. If you plan to use this in combination with sensitive data, you should apply http digest authentication with apache.
If you need the sample project to give you a better start, feel free to download it here: project.